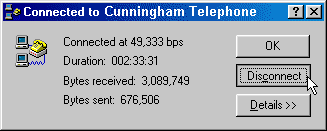
This site is designed to step you through switching from any previous Internet connection to your new Cunningham Telephone Internet connection to NCKCN with the Windows 95/98 Dial-up Networking. This is the Windows component which actually makes your connection to the Internet. You can set modem parameters, TCP/IP settings, and authentication parameters to name a few. Note, your screen may look slightly different, however, the procedure should be the same.
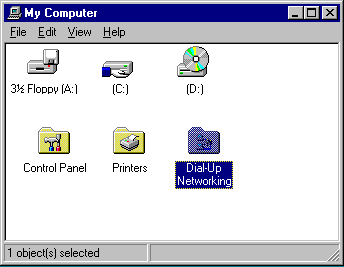
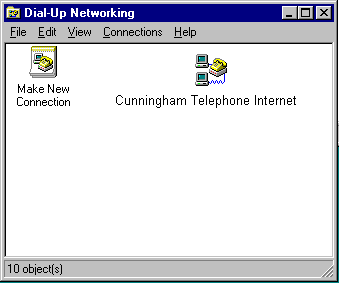
To get to Dial-up Networking, simply double-click My Computer on your desktop

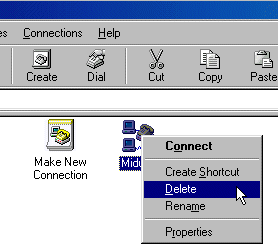
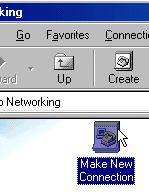
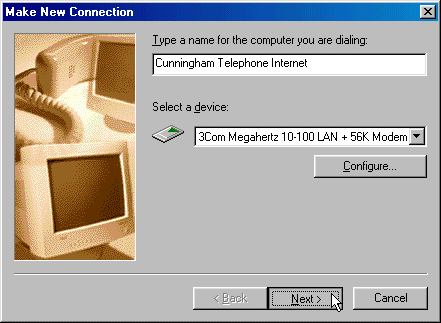
The wizard will ask you to name the new connection. We suggest you type in "Cunningham Telephone Internet" as shown. Your modem should already be installed and working correctly and should be listed in the Select a device. (Your screen may look different, but will have similar information.)
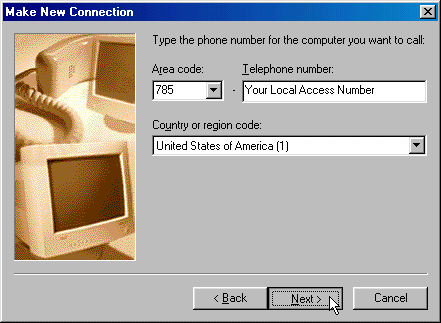
Next you will need to supply your local access number. This will be provided by Cunningham Telephone and will be dependant upon your location. Click Next to continue.
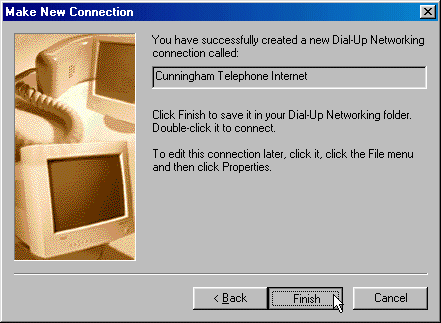
The wizard will create your new connection. Simply click the Finish button.
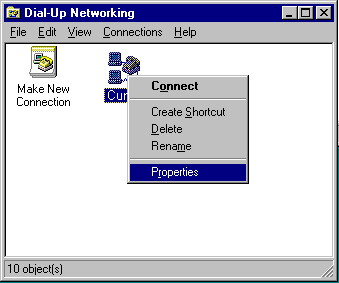
Now you will configure the default settings so that your new Dial-Up Networking connection will connect you to Cunningham Telephone Internet. Simply right-click on the new Cunningham Telephone Internet and select the Properties menu.
Depending on your version of Windows, the General tab allows you to set the local access phone number for your connection, select which modem you want to use for this connection, as well as view/edit the configuration of that modem.
Check to make sure your local access number is correct. You can change it by simply typing in the correct access number you receive from Cunningham Telephone.
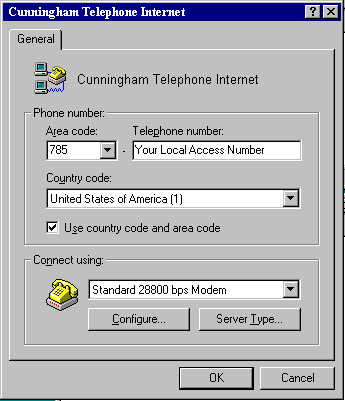
Windows 95 Version
"A"
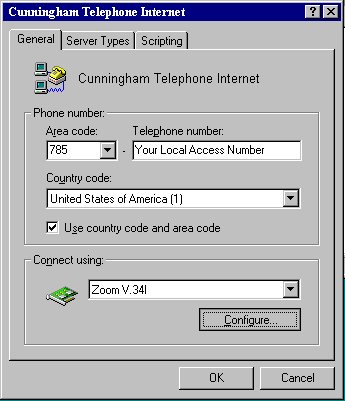
Windows 95 Version
"B"
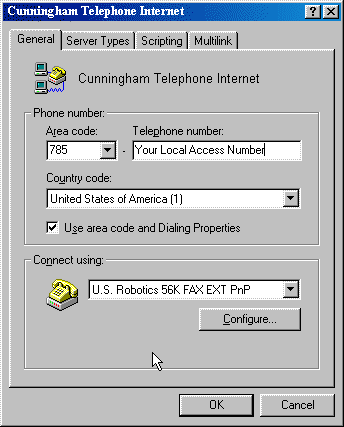
Windows 98
To set or confirm the modem configuration, select the Configure button as shown. Note that you probably don't have to change anything with your modem settings unless you have had to previously specify special modem settings such as bringing up a terminal window.
The General tab on the modem properties allows you to select the Com port to use for the selected modem, speaker options, and modem speed as shown. (You settings may look different)
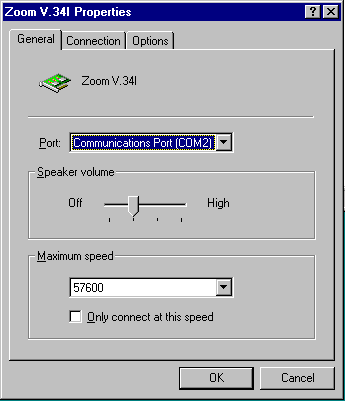
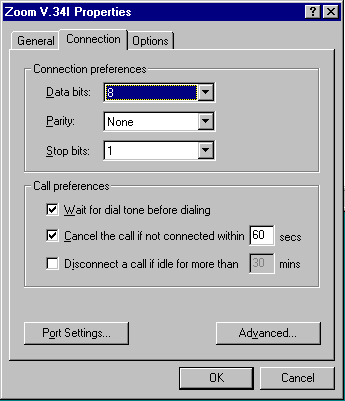
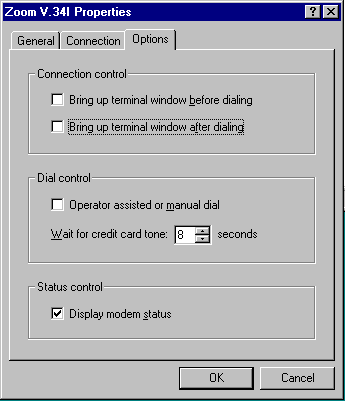
Simply click the OK button to set your modem configurations. This should take you back to the Dial-Up Networking Connection properties dialog box. Note, you might have a fourth tab, Distinctive Ring, with Windows 98. You will not need to set any parameters on that tab.
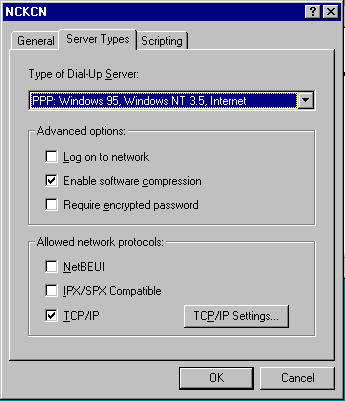
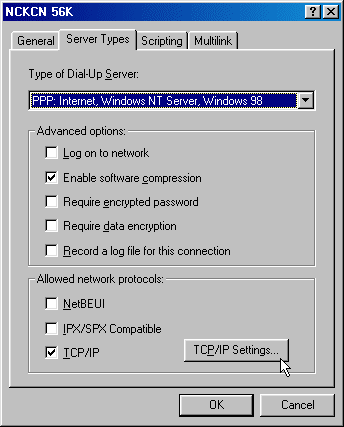
To correctly set Server Types to connect , first select the Sever Types tab as shown. (If you have Windows 95 version A, it has a Server Type...button).
In Server Types, make sure you set the options set exactly as shown below. You simply click in the check box to either enable it, (make a check mark), or disable it, (uncheck it). The specific settings are listed below. These are the only options that should be checked and no others. Any other settings may not allow you to connect properly.
Type of Dial-Up Server: PPP:
Windows 95, Windows NT 3.5, Internet
Advanced options: Enable software compression
Allowed network protocols: TCP/IP
Windows 95
Windows 98
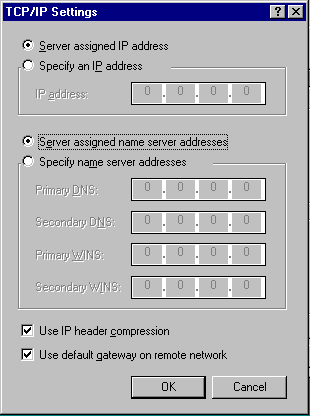
You will want to have your settings exactly as shown. You want Server assigned IP address as well as Server assigned name server addresses selected. Also make sure the Use IP header compression and Use default gateway on remote network options are set. NCKCN does not require any DNS setting other than the ones shown below. Click OK to continue.
To manually connect (dial up), or to change your username or password, simply follow these steps.
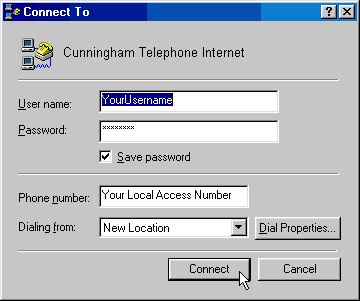

That's it, your Dial-Up Networking connection is now ready for use.
